Difference between revisions of "Meetings: Instructional Tips"
From DurhamtechWiki
Jump to navigationJump to search| Line 3: | Line 3: | ||
[[File:CanDo-UploadFile.png|750px|border|alt=Features available when uploading a file to display include: create breakout rooms, write on the whiteboard, display a file, access captioning, access the record button, sharing websites, ending the meeting.]] | [[File:CanDo-UploadFile.png|750px|border|alt=Features available when uploading a file to display include: create breakout rooms, write on the whiteboard, display a file, access captioning, access the record button, sharing websites, ending the meeting.]] | ||
| − | |||
===Uploading Tip=== | ===Uploading Tip=== | ||
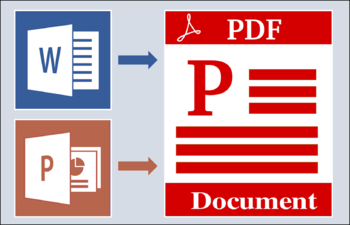
[[File:icon-Idea.png|50px|alt=Idea icon]]<big>Save your Word documents and PowerPoint presentations as PDFs before uploading them to Meetings.This will reduce the amount of time Meetings will need to process and covert your file(s).<br> | [[File:icon-Idea.png|50px|alt=Idea icon]]<big>Save your Word documents and PowerPoint presentations as PDFs before uploading them to Meetings.This will reduce the amount of time Meetings will need to process and covert your file(s).<br> | ||
| Line 17: | Line 16: | ||
</ul></big> | </ul></big> | ||
| − | ==Instructional Tips for Screensharing (High Bandwidth ONLY)== | + | ===Instructional Tips for Screensharing (High Bandwidth ONLY)=== |
===Features Available When Screensharing=== | ===Features Available When Screensharing=== | ||
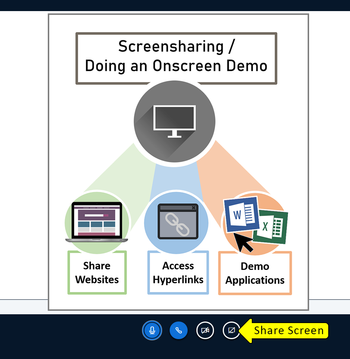
[[File:CanDo-Screensharing.png|350px|alt=Features available when screensharing: sharing websites, accessing hyperlinks, demonstrating applications.]] | [[File:CanDo-Screensharing.png|350px|alt=Features available when screensharing: sharing websites, accessing hyperlinks, demonstrating applications.]] | ||
| Line 36: | Line 35: | ||
</ul> | </ul> | ||
</big> | </big> | ||
| − | |||
===Screensharing Tips=== | ===Screensharing Tips=== | ||
| − | |||
[[File:icon-Idea.png|50px|alt=Idea icon]]<big>To help your demonstration go smoothly, there are a couple of things you can do ahead of time before starting the screenshare:</big> | [[File:icon-Idea.png|50px|alt=Idea icon]]<big>To help your demonstration go smoothly, there are a couple of things you can do ahead of time before starting the screenshare:</big> | ||
<big> | <big> | ||
Revision as of 14:09, 20 November 2020
Contents
- 1 Instructional Tips (for Higher OR Lower Bandwidth Activities)
- 1.1 Features Available When Presenting an Uploaded File
- 1.2 Uploading Tip
- 1.3 Features NOT Available When Presenting an Uploaded File
- 1.4 Instructional Tips for Screensharing (High Bandwidth ONLY)
- 1.5 Features Available When Screensharing
- 1.6 Examples of How Screensharing is Utilized
- 1.7 Screensharing Tips
- 1.8 Features NOT Available When Screensharing
Instructional Tips (for Higher OR Lower Bandwidth Activities)
Features Available When Presenting an Uploaded File
Uploading Tip
![]() Save your Word documents and PowerPoint presentations as PDFs before uploading them to Meetings.This will reduce the amount of time Meetings will need to process and covert your file(s).
Save your Word documents and PowerPoint presentations as PDFs before uploading them to Meetings.This will reduce the amount of time Meetings will need to process and covert your file(s).

Features NOT Available When Presenting an Uploaded File
- Sharing websites
- Accessing hyperlinks embedded in a PowerPoint presentation
- Demonstrating applications, such as Word or Excel
Instructional Tips for Screensharing (High Bandwidth ONLY)
Features Available When Screensharing
Examples of How Screensharing is Utilized
- Sharing a website to:
- display your Sakai course
- display the Durham Tech website or library resources
- share another website resource
- walk your students through a publisher site
- Demonstrating an application installed on your device, such as:
- typing something in Word or Excel
- using a webpage editor
- how to use AutoCAD
Screensharing Tips
 To help your demonstration go smoothly, there are a couple of things you can do ahead of time before starting the screenshare:
- open any applications you will be demonstrating
- open any web sites you will need in separate browser tabs
 If you want to display a PowerPoint presentation while screen sharing, you will need to open PowerPoint and display the presentation on your computer's desktop.
Features NOT Available When Screensharing
The following Meetings features are not readily available when screensharing during a demonstration:
- Displaying a file in the presentation area of Meetings
- Writing on the whiteboard
- Sharing external videos (and audio content)
- Creating Breakout rooms
- Accessing Captions
- Accessing the Recording button
- Ending the Meeting
