Difference between revisions of "Meetings: Presenter Features"
From DurhamtechWiki
Jump to navigationJump to search| Line 47: | Line 47: | ||
</ul></big> | </ul></big> | ||
===Instructional Tips for Screensharing=== | ===Instructional Tips for Screensharing=== | ||
| − | ====Some ideal uses of this feature | + | ====Some ideal uses of this feature==== |
<big> | <big> | ||
<ul> | <ul> | ||
| Line 62: | Line 62: | ||
<li>PowerPoint</li></ul> | <li>PowerPoint</li></ul> | ||
</big> | </big> | ||
| + | |||
====Other Tips==== | ====Other Tips==== | ||
<big> | <big> | ||
Revision as of 15:54, 12 November 2020
The Presenter has the option to upload files for display during the session, as well as the ability to screenshare. However, both options cannot be performed at the same time, so the Presenter must plan ahead to determine which option will best suit the session’s activities. Consider your bandwidth connection when planning your Meetings activities.

Contents
Activities Suitable for Lower and Higher Bandwidth Connections
- Upload a Presentation (and upload multiple files and enable user download during the session)
- Start a poll
- Use smart slides (PowerPoint slides created before the session)
- Custom Polling (during the session)
- Polling verbally
- Share an external video
- Users and Instructors can:
Instructional Tips
- Save your Word documents and PowerPoint presentations as PDFs before uploading them to Meetings. This will reduce the amount of time Meetings will need to process and covert your file(s).
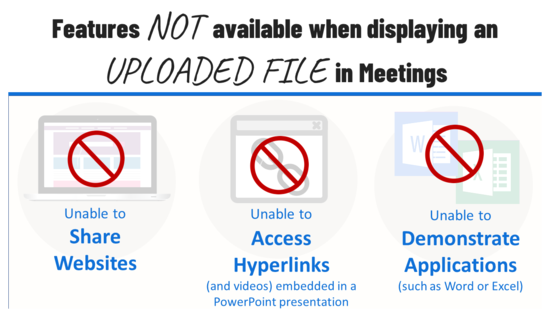
- Several Meetings features are unavailable when you choose to display an uploaded file. You will be unable to:
Screensharing (Higher Bandwidth ONLY)
If you want to share your desktop to display websites or software applications that are located on your computer, you will need to share your screen.
To successfully share your screen, you MUST use Chrome or Firefox and NOT a mobile device.
- Share your screen to view a website or demonstrate an application
- Using Chrome web browser
(Choose: “Your Entire Screen” ) - Using Firefox web browser
(Choose “Entire Screen” [the last option] to share your screen OR you can share a specific web browser tab or a specific application application) - https://support.blindsidenetworks.com/hc/en-us/articles/360025276251-Share-my-screen#h_12864300-45a0-422f-9039-f54151d1d0d1 What do you see in the presentation area when you start screensharing? (Click on link and scroll down)]
- Using Chrome web browser
- Ending your screenshare
- Moving from sharing your screen back to the Meetings session (to return to your presentation or manage users)
Instructional Tips for Screensharing
Some ideal uses of this feature
- Sharing a website, for example:
- to display your Sakai course
- to display the Durham Tech website or library resources
- to share another website resource
- to walk your students through a publisher site
- Demonstrating an application installed on your device, such as:
- Word (link to O365 info)
- Excel (link to O365 info)
- A webpage editor
- AutoCAD
- PowerPoint
Other Tips
- It is recommended that you open any applications and web sites you will need during your session in separate browser tabs before starting your meeting, so you can quickly transfer to them during your screen share.
- When you share your screen, the presentation area displays a “mirror” of your desktop. This is normal, and both you and your students will see this effect until you display a web site or application on your desktop:
- If you want to display a PowerPoint presentation while screen sharing, you will need to open PowerPoint and display your presentation in the application.
